
A Swim Jet or Counter Current is a machine that generates a flow of water against which you swim. When you swim at the same pace as the counter current, you are able to swim for as long as you like (or if you swim as well as I don’t lol, more “as long as your can!”)
The swim jet or counter current gives you a means of swimming naturally in a much smaller space than an Olympic sized swimming pool. This is ideal when space is of a premium in our back yards.

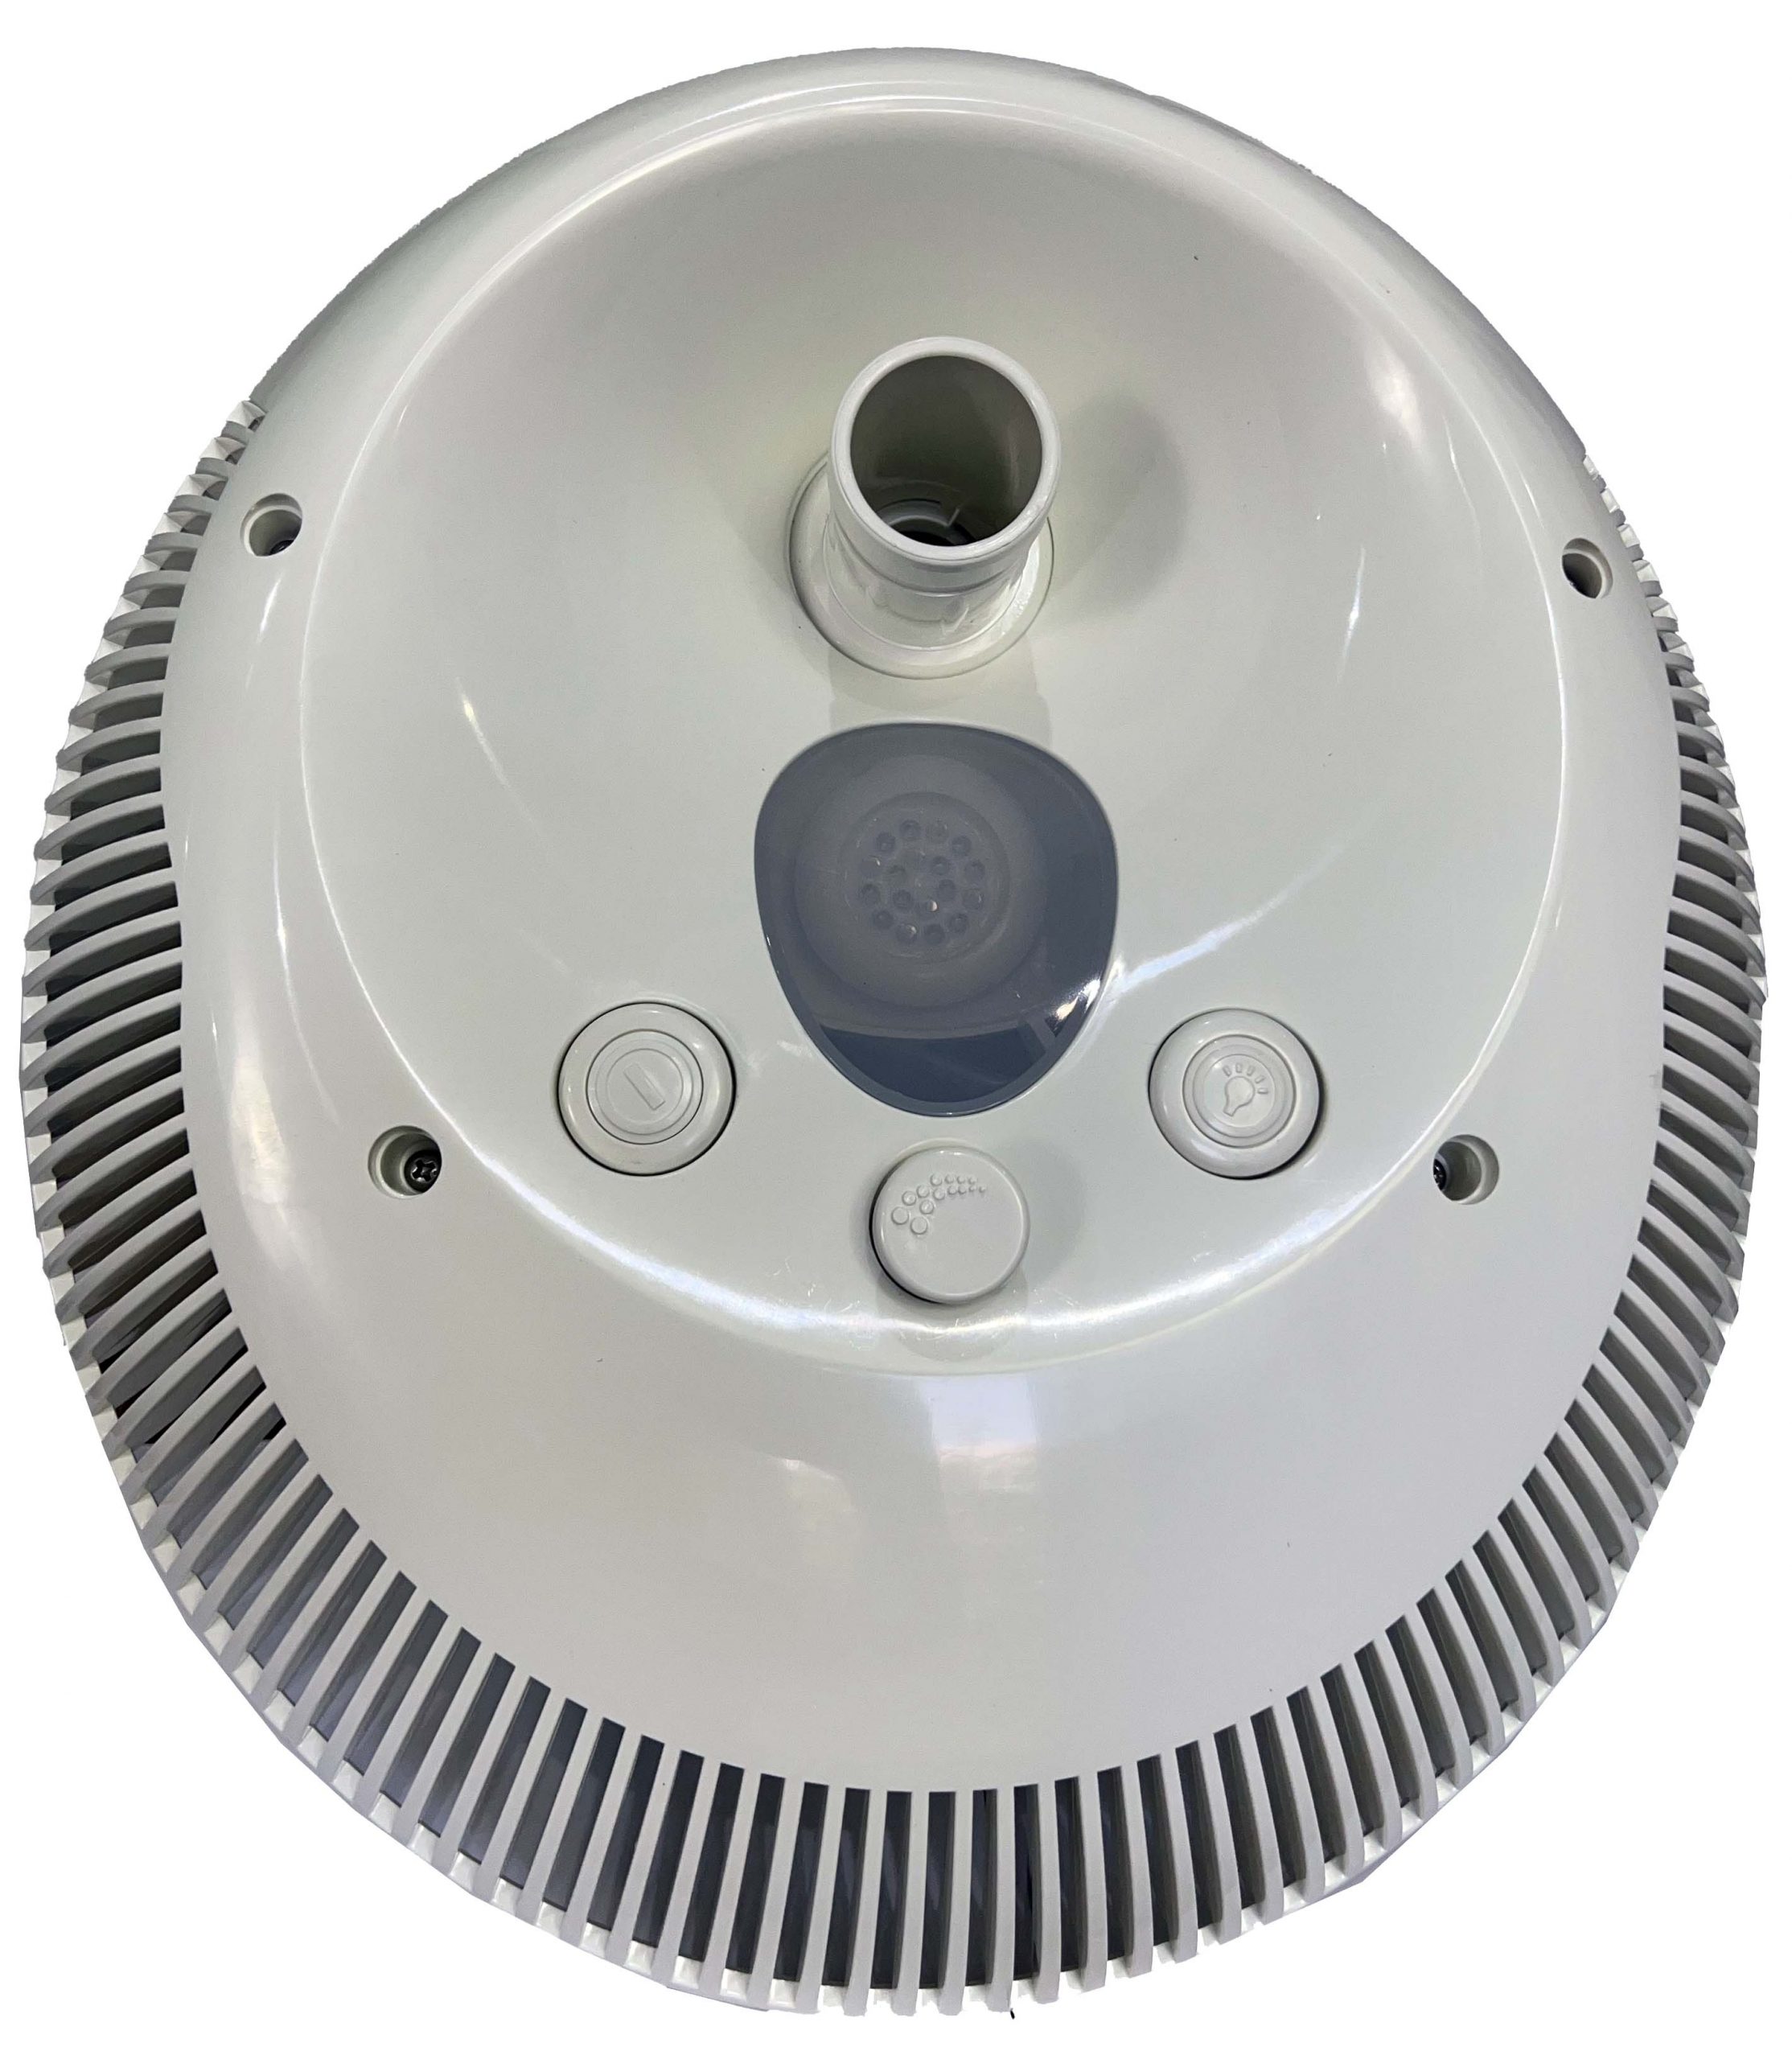
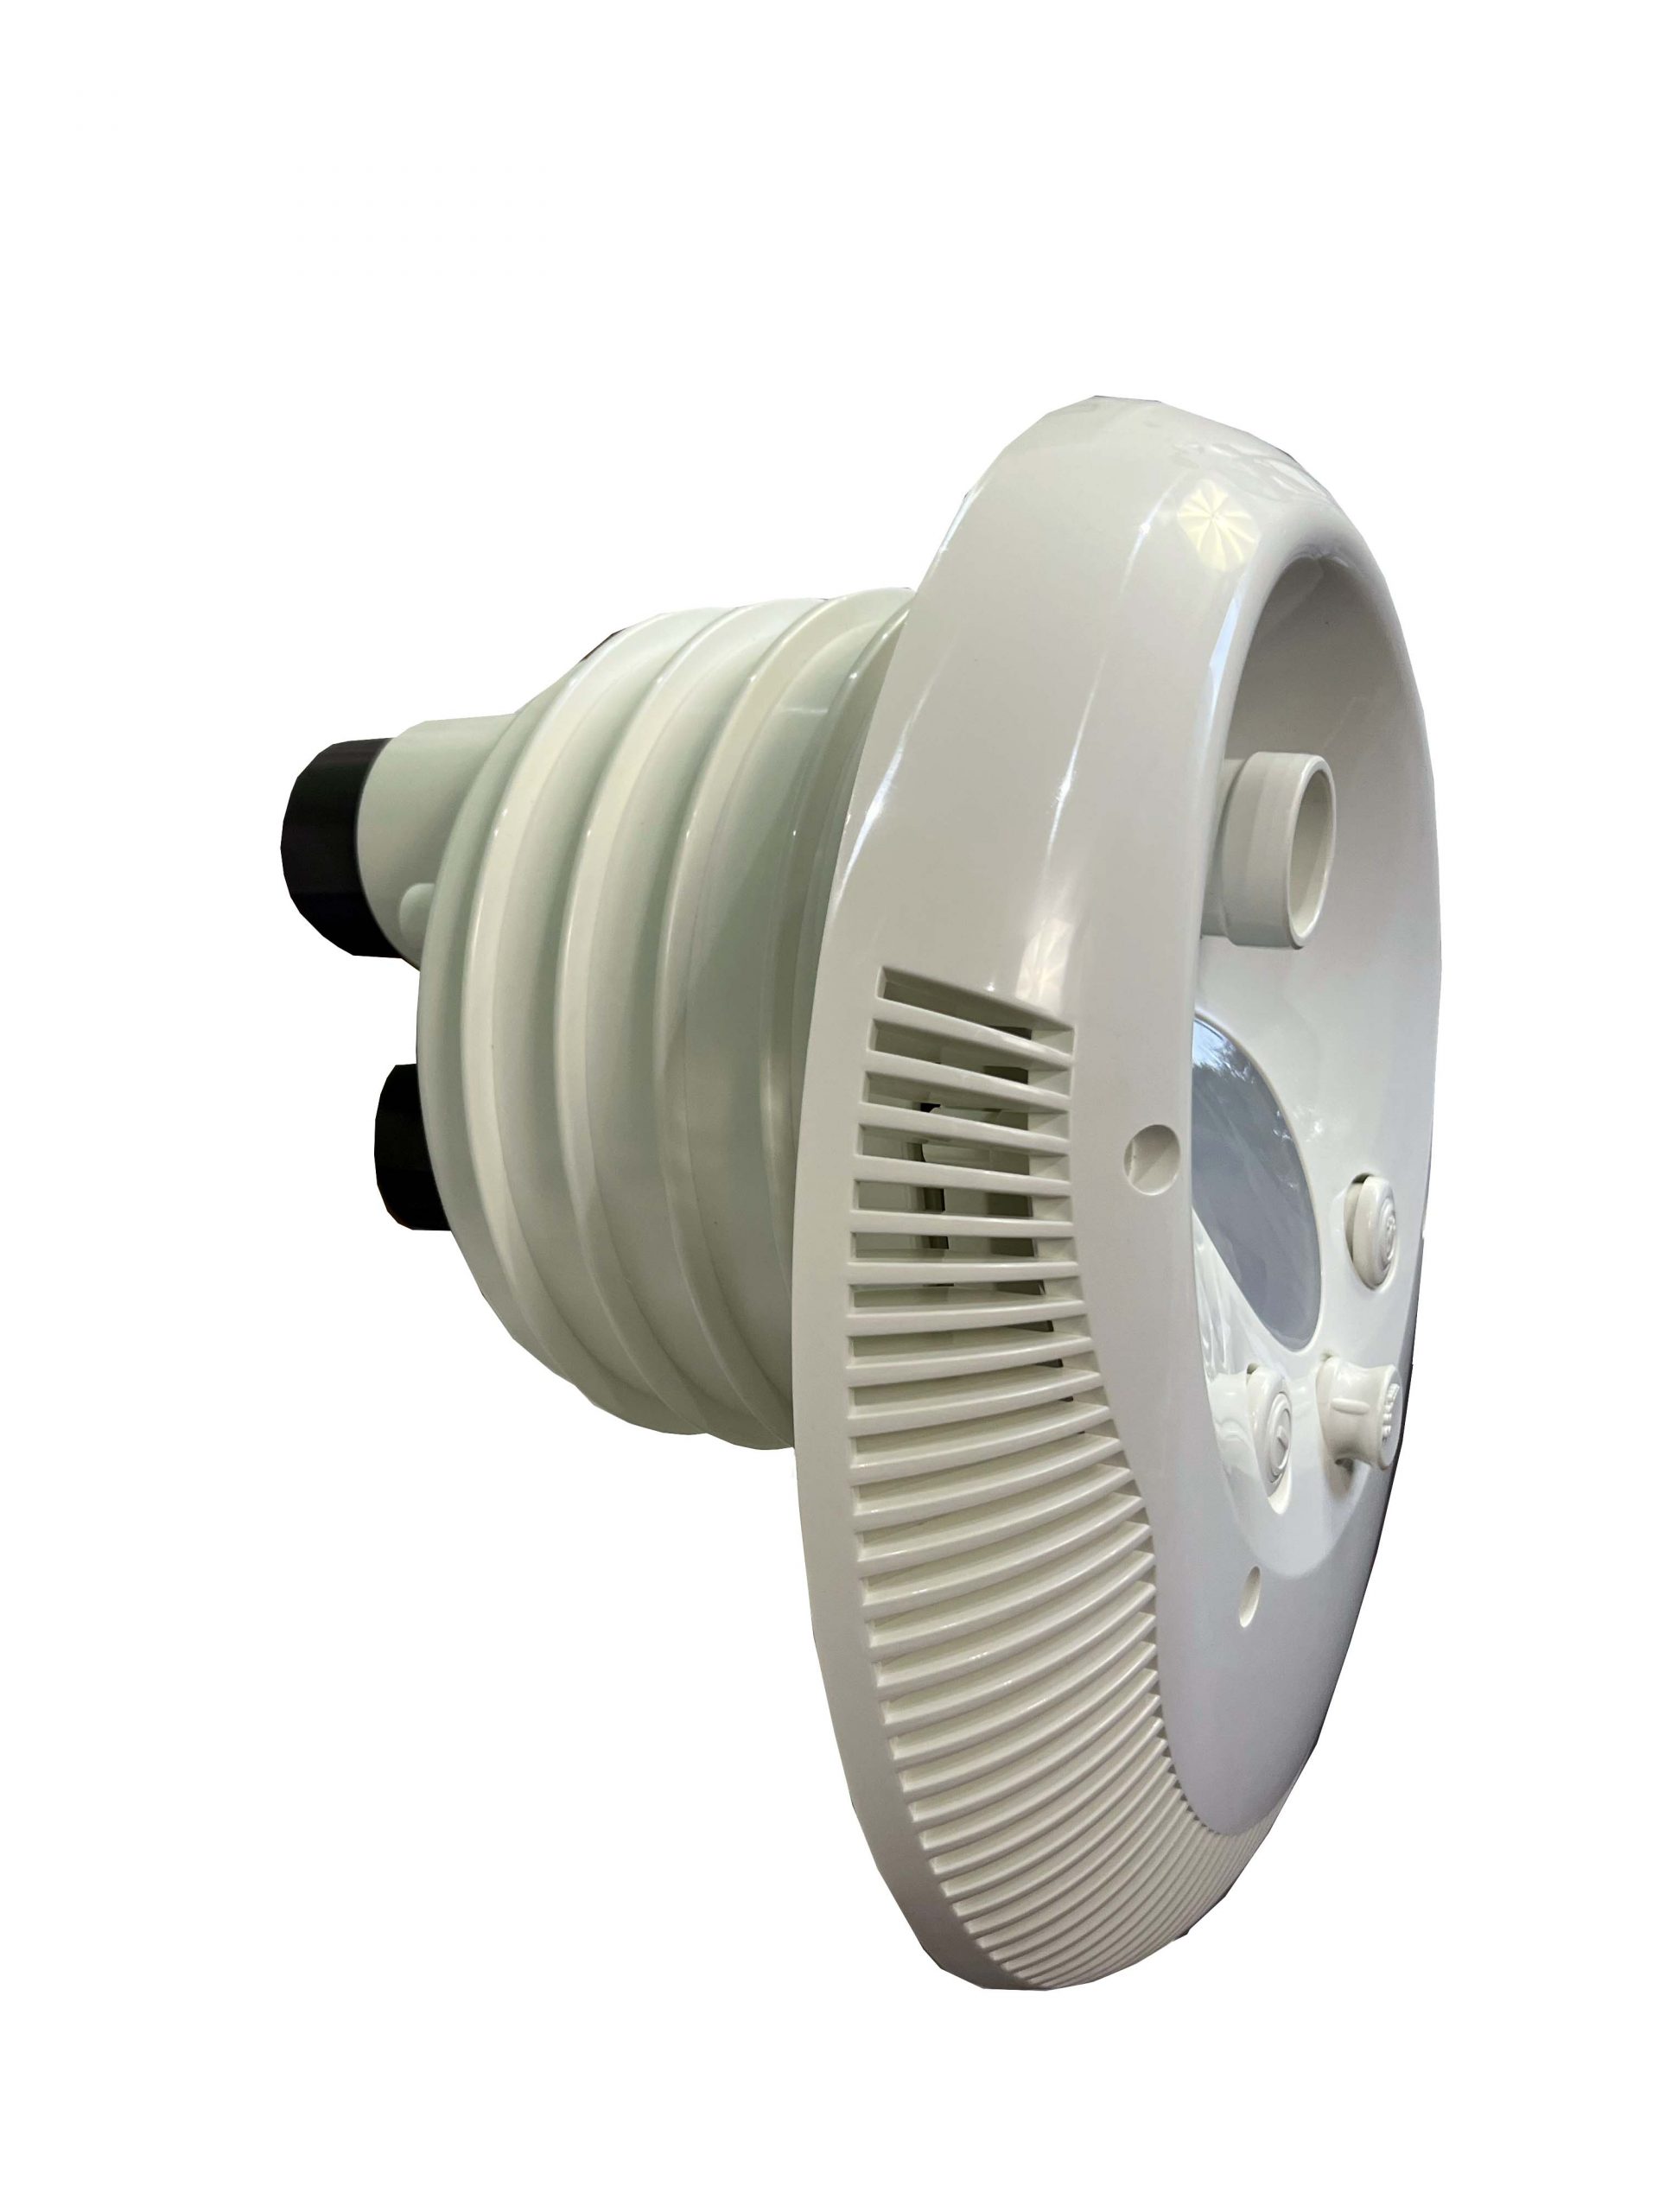
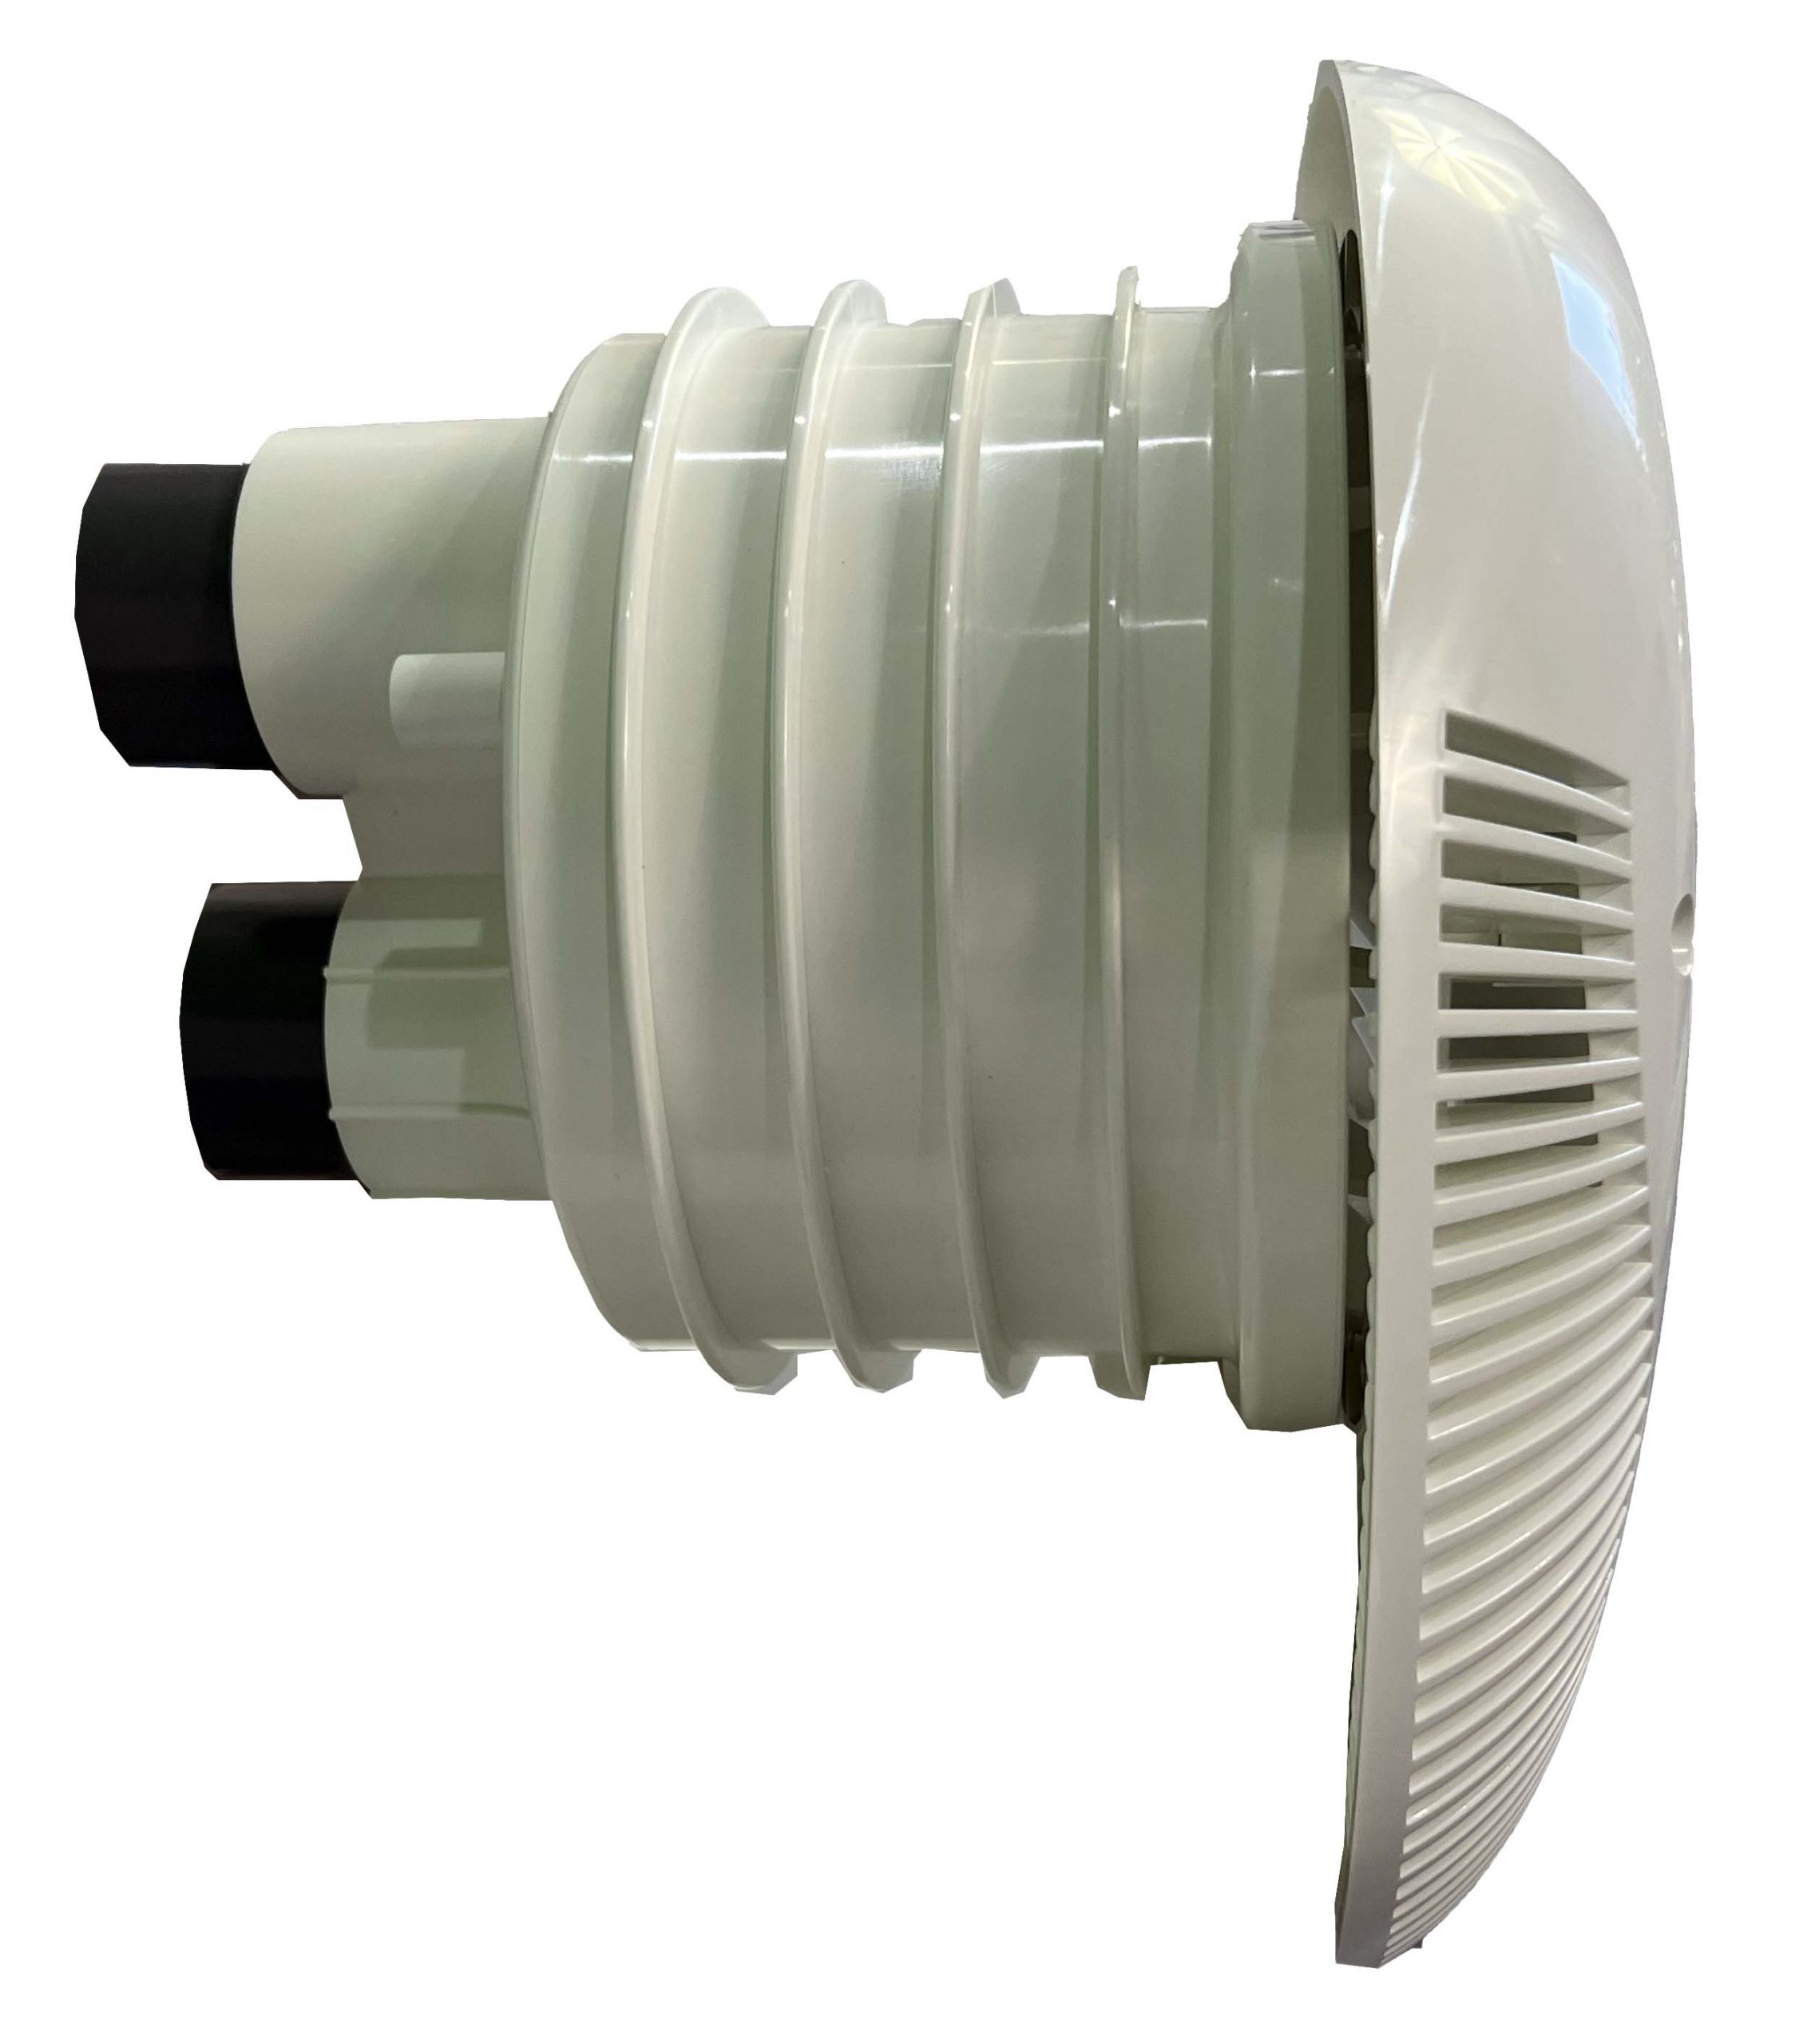
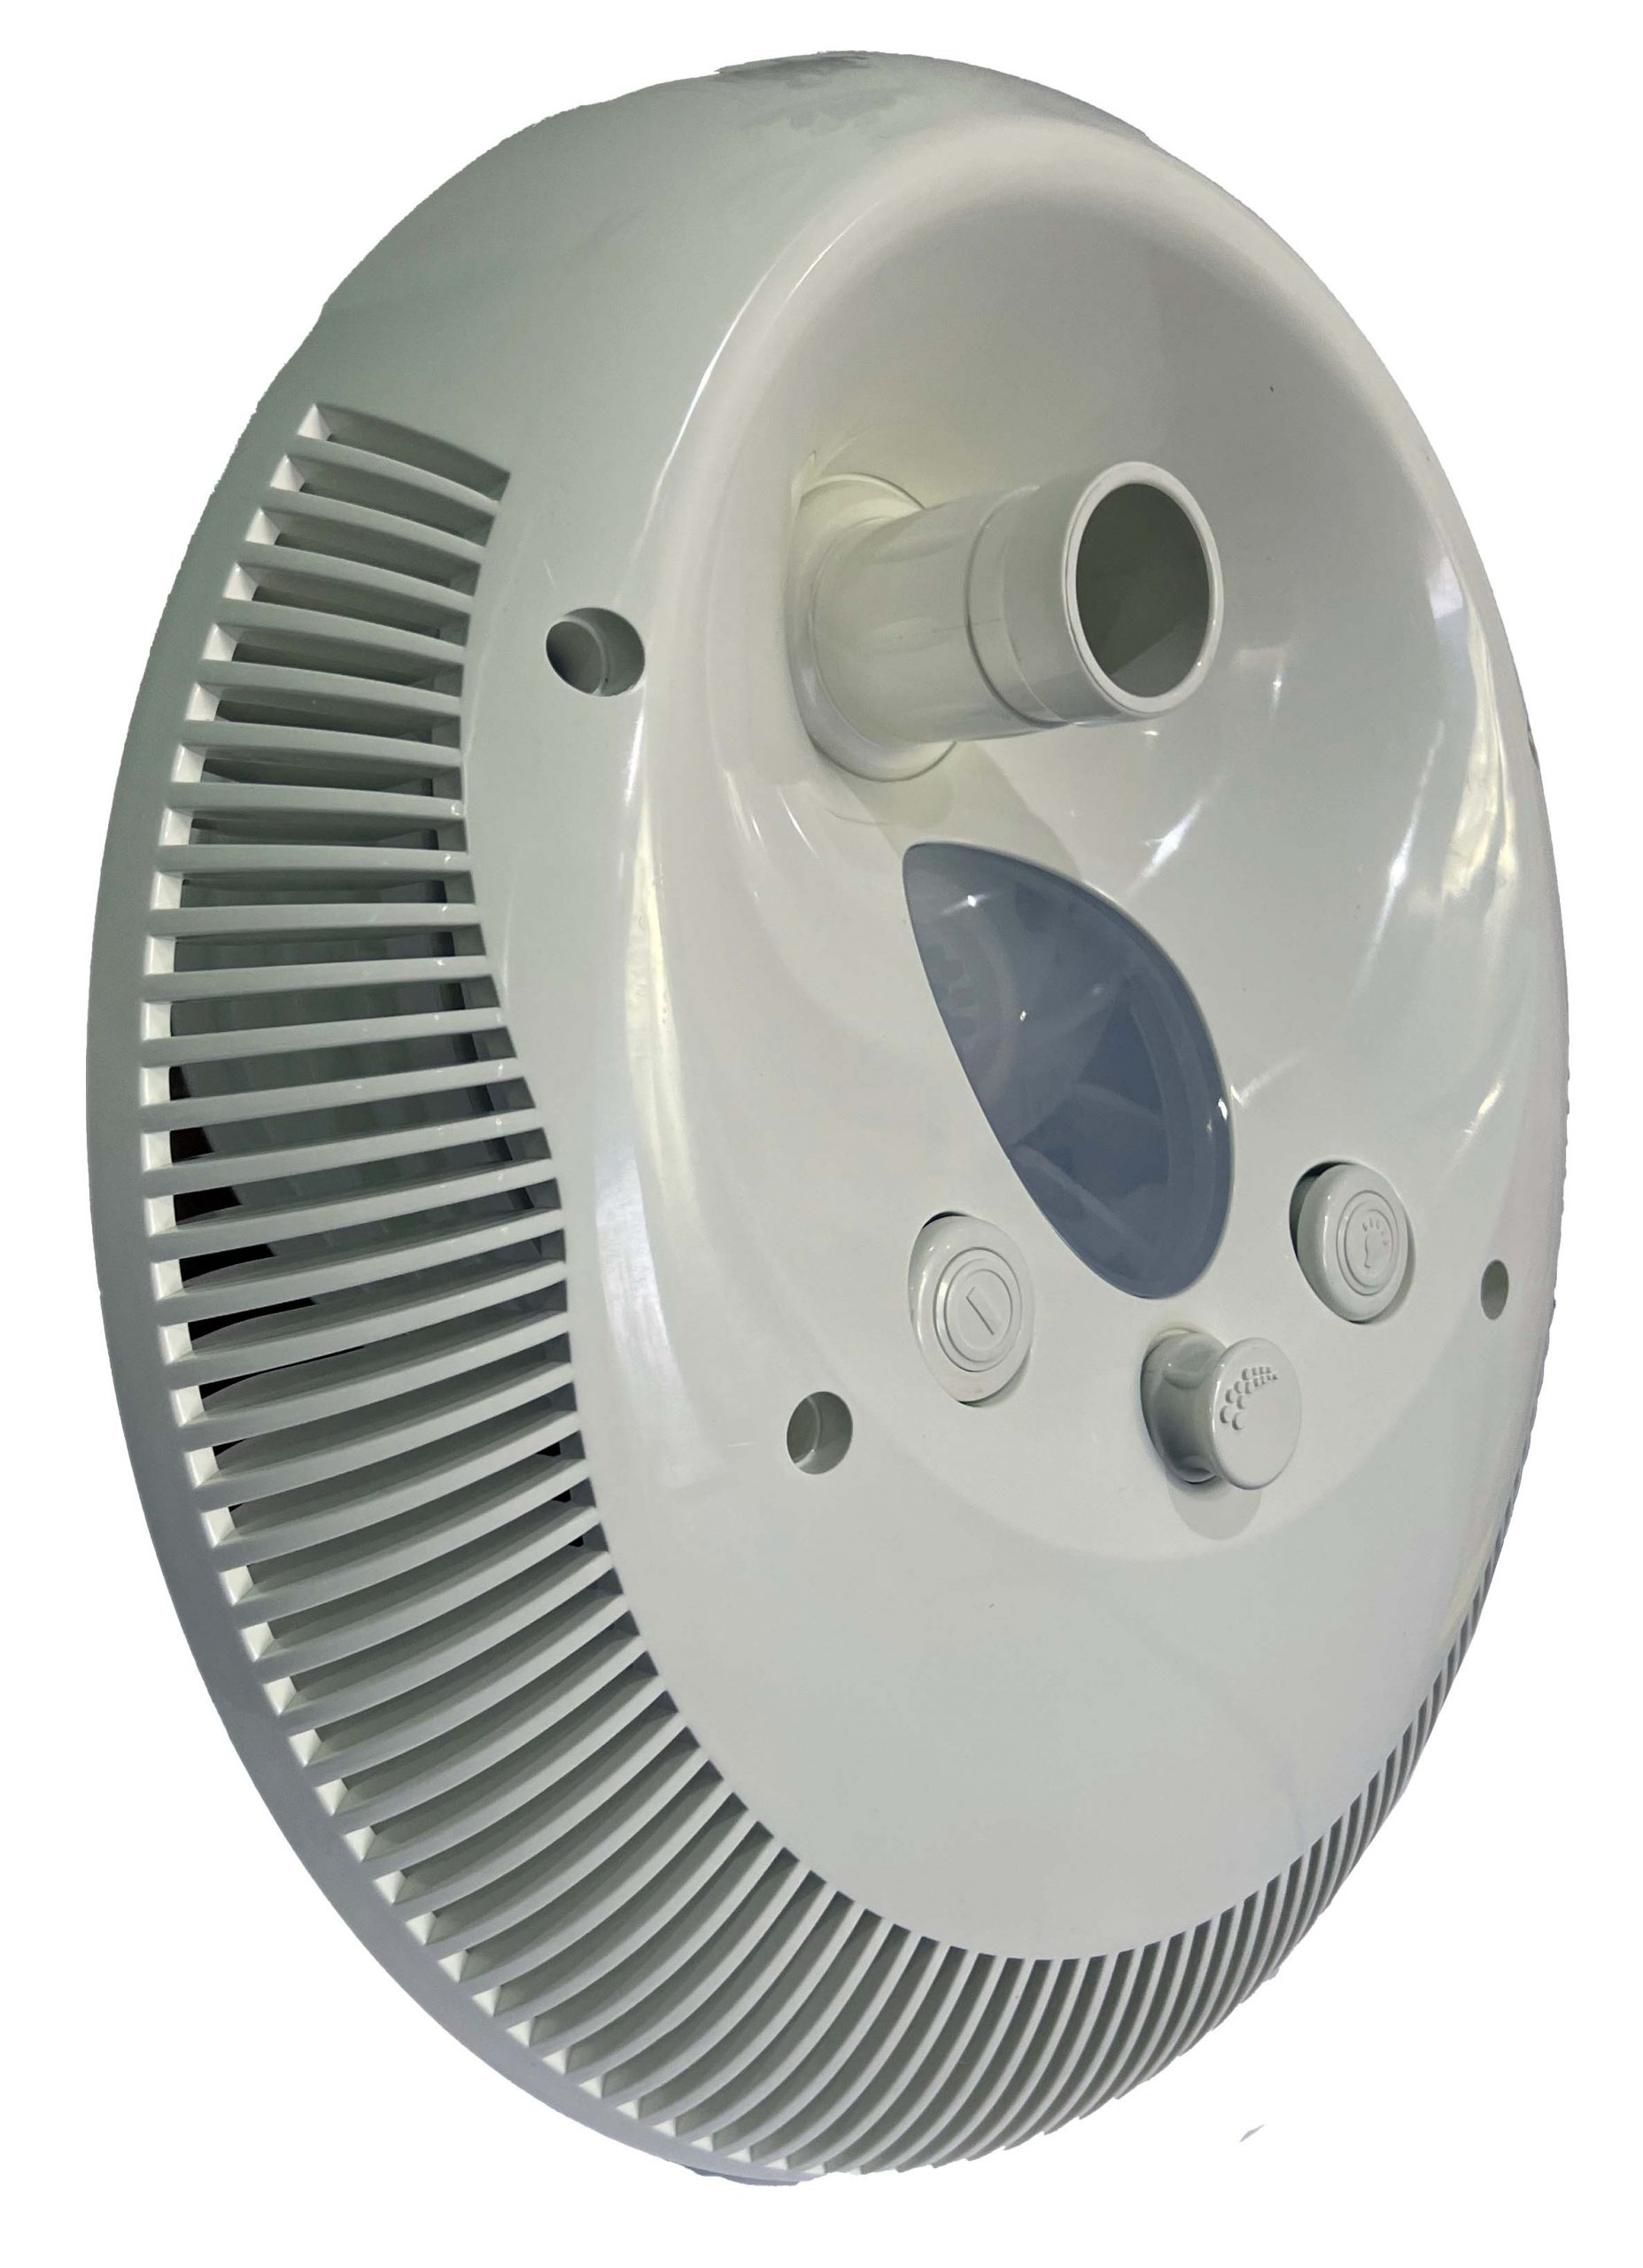
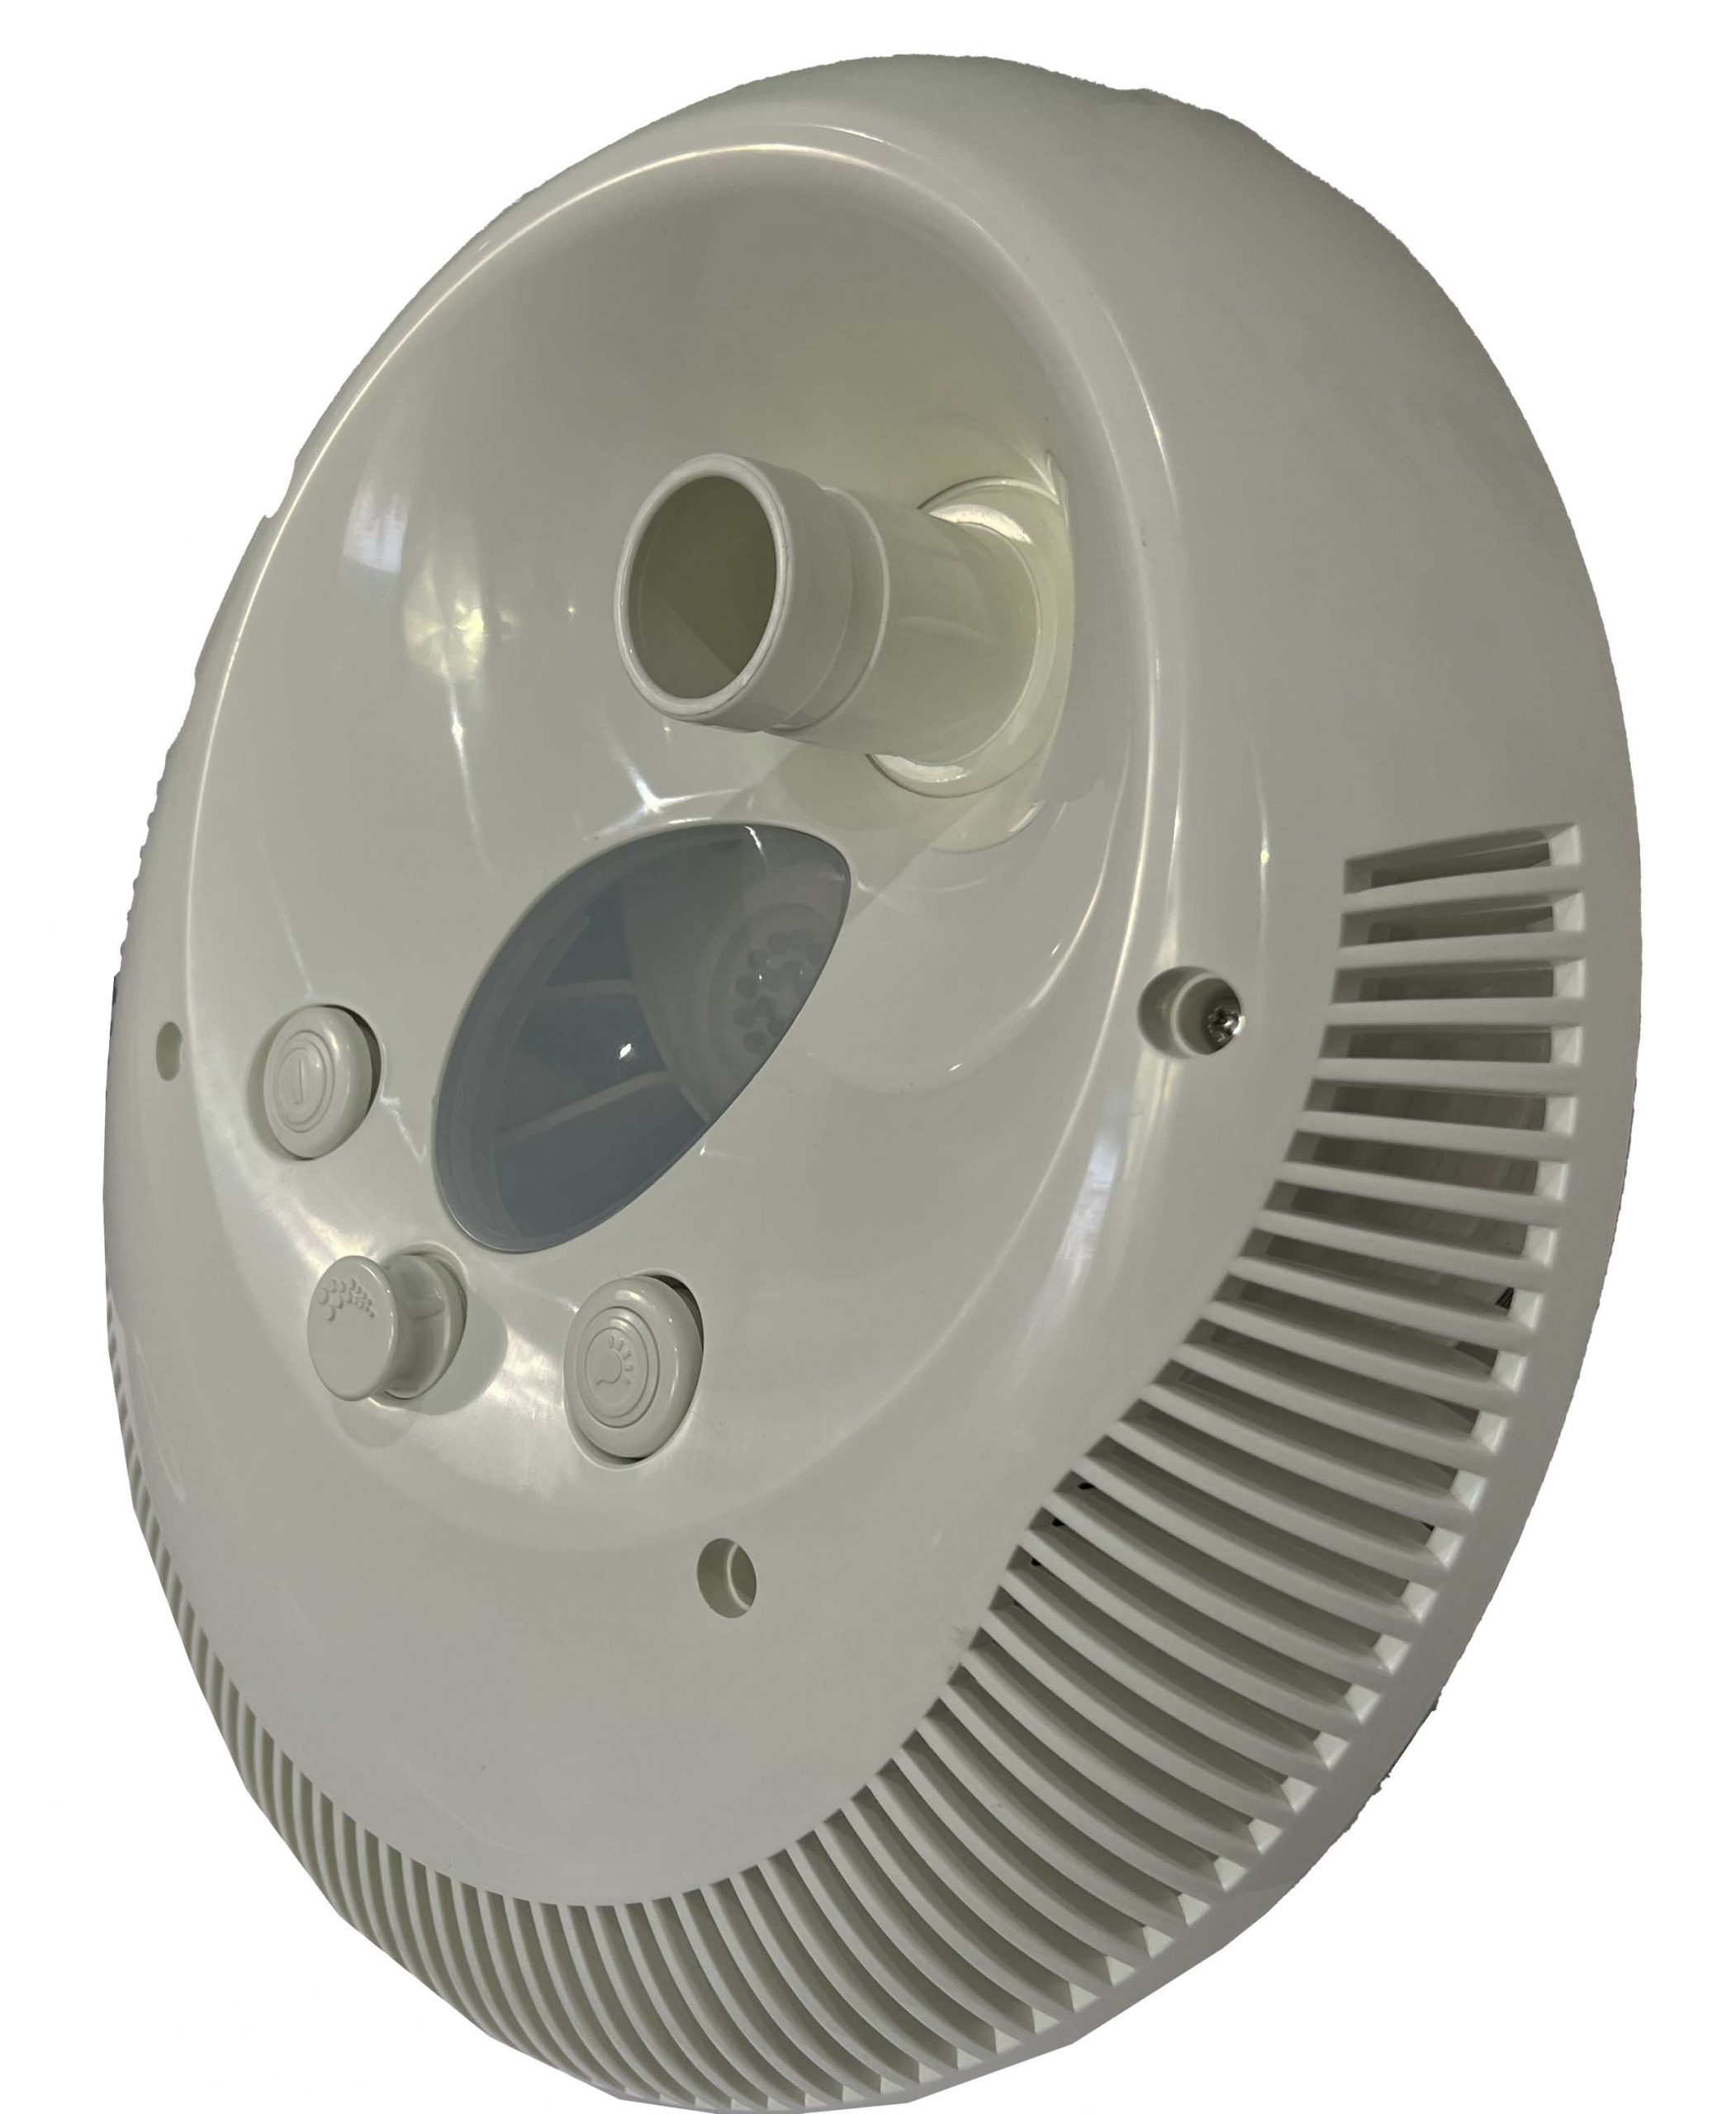
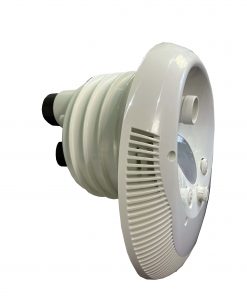
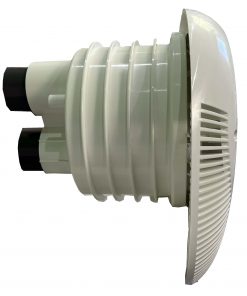
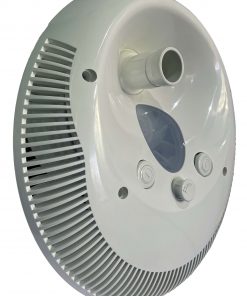
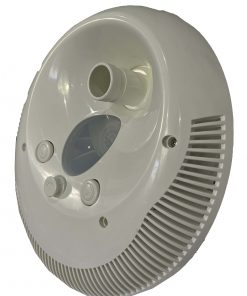
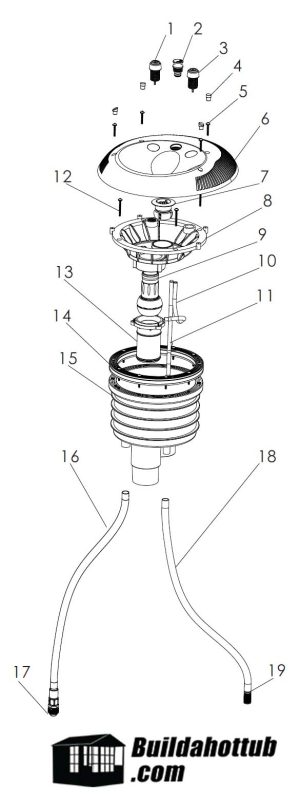
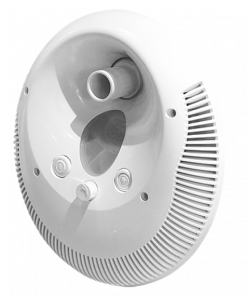
What is the parts breakdown of the Swim Jet?
1 Air button for water pump x1
2 Air Adjusting x1
3 Air Button for Water Light x1
4 Threaded Plug for Lid x1
5 M5*20mm Screws x4
6 Lid x1
7 LED spa light 1w, 12v
8 Support Frame x1
9 Water Jet x1
10 D12mm x 8mm x 40mm Air Adjusting Hose x2
11 D5mm x 3mm x 3M Transparent Hose x2
12 M6 x 20 Screw (AISI316) x4
13 Water Jet Fixed Pipe x1
14 Vinyl & Fiberglass Pool Fittings (2 x rubber gaskets and faceplate)
15 Swim Jet Body x1
16 Conduit for Light Cable and Air Hose x1
17 Cable Grand x1
18 Exhaust Hose x1
19 Venting Plug x1
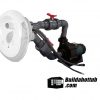
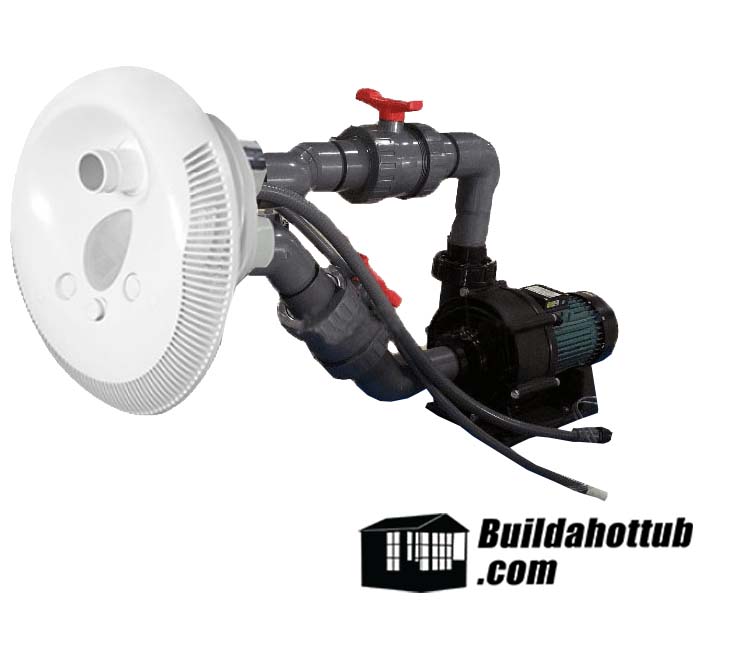
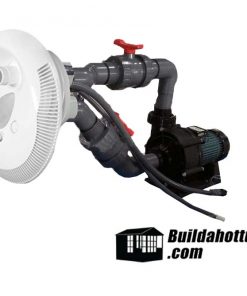
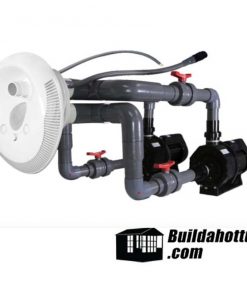
| Swimjet (Body & Faceplate) |
| (Includes parts 1-19 on diagram) |
| 2 x Air Switches |
| 2 x 75mm Couplers |
| 2 x 75mm to 2″ Reducers |
| 2 x 2″ Ball Valves |
| 2 x 2″ 90 Degree Bends |
| 2 x 2″ 45 Degree Bends |
| 2 x 2″ Unions |
| 1 x 4HP Single Speed Pump (230V) **please note this MUST be installed below the waterline as shown in the diagrams below** |
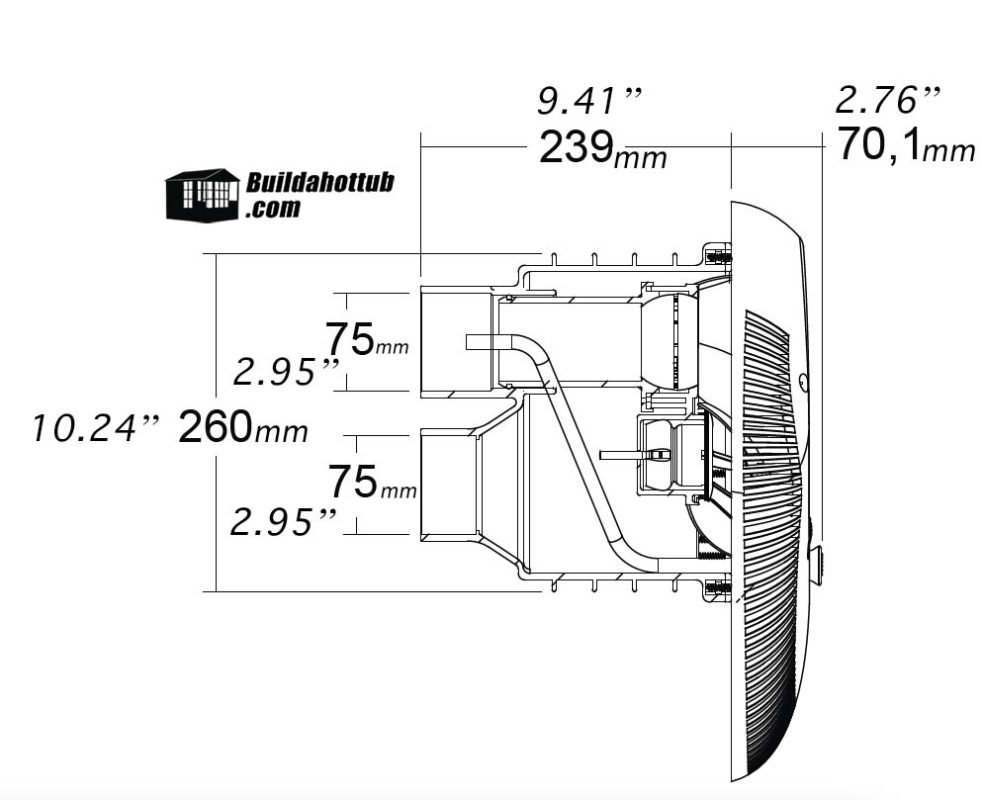
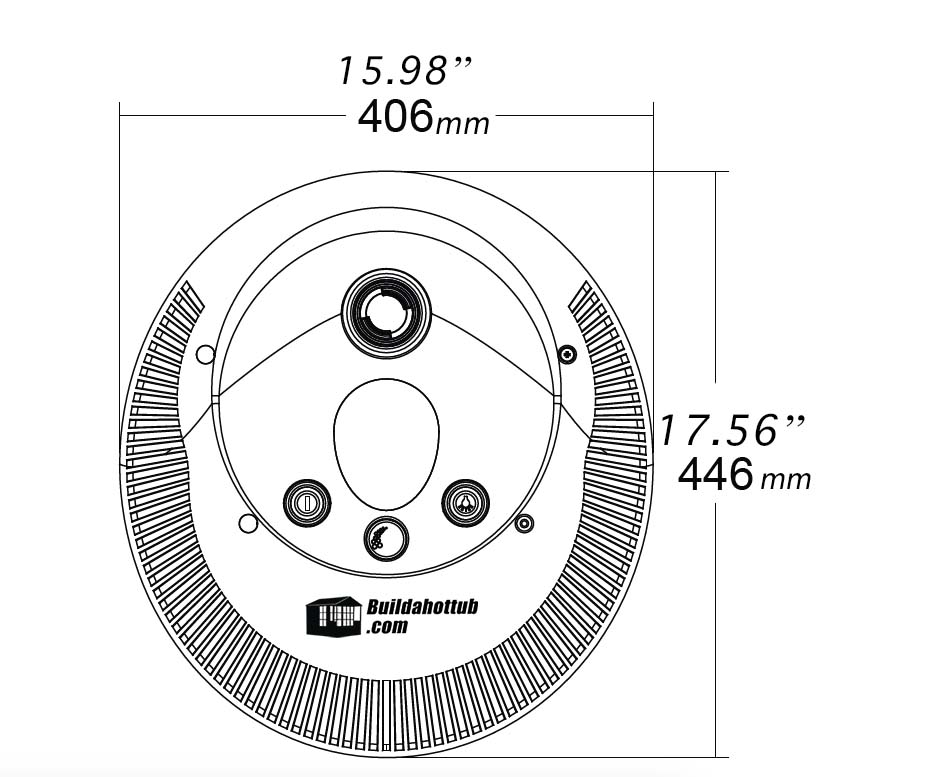
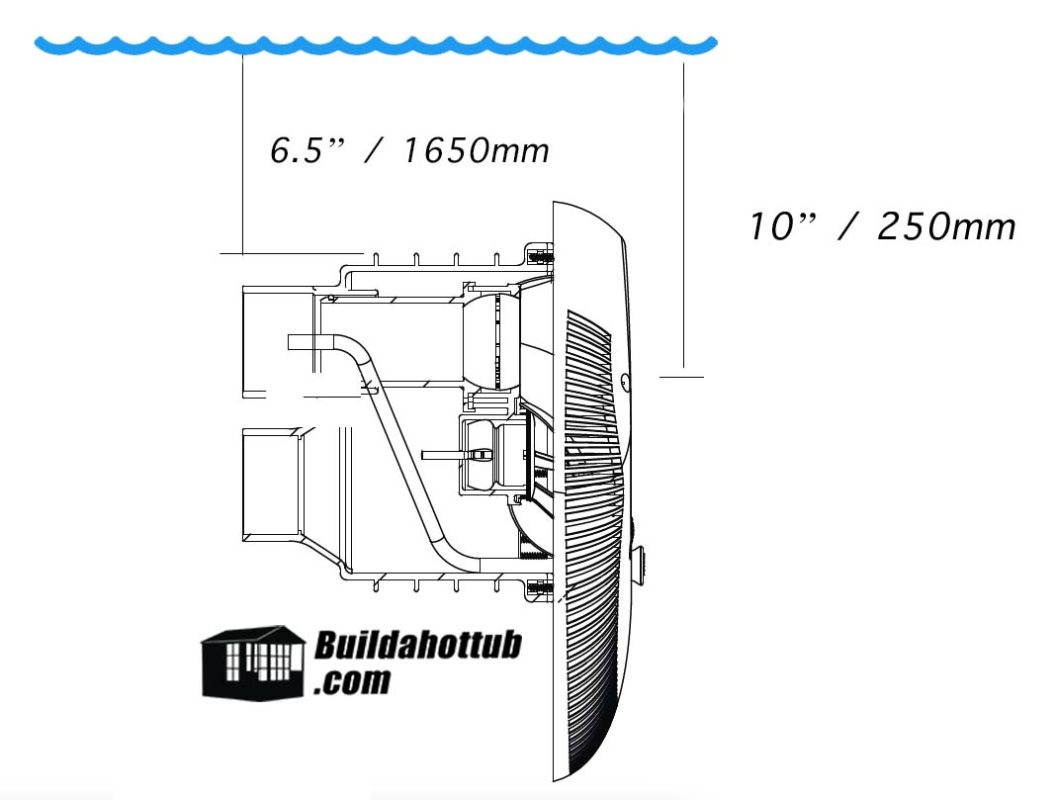
What are the Dimensions of the Swim jet?
Where do I position the Swim Jet in the Hot Tub or Pool.
Firstly, the pool or hot tub should be a minimum of 4m or 14′ in length. Otherwise, there can be a wave that comes off the back wall when you are swimming and can be off putting.
Secondly, the swim jet nozzle should be 250mm or 10″ below the surface. This is the same regardless of the type of construction method you are using on your pool or tub.
Who is this Swim Jet for?
Whilst there are models on the market that cost 4-6x the price of this particular unit, they are very much for the pro swimmer. This swim jet is notfor the pro swimmer. This jet is good enough for a “fitness swimmer”, even a “good swimmer” but not a “professional swimmer” in training.
It is possible to adjust the flow and the angle of the jet, but if you are an athlete in training or a professional swimmer, you are going to want to invest in a hydraulic-based system. They can increase the flow of the current considerably more and are suited to the speed an athlete in training needs to swim. This is an electric or jet pump-based system which is ideal for you and I to improve our fitness in ones backyard.
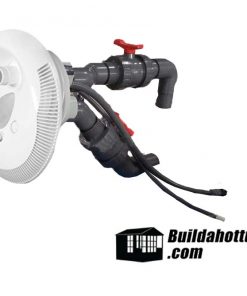
How Does the Swim Jet Work?
The counter current swim jet is a self-contained unit. The water is drawn in from the sides of the unit and then delivered back into the pool under pressure from the jet pump. There are clever designs inside the unit to minimise the amount of bubbles that are created.
From the front of the unit, there is an air switch that allows you to turn the unit on an off.
The air switch itself (well, the actuator) is connected to the physical electrical switch via tubing that when pressed, the air turn on the switch which in turn, triggers the pump to run. Pretty cool. Now it’s time to install a swim jet.
Related products
Counter Current / Endless Pool Swim Jet
Counter Current / Endless Pool Swim Jet
Counter Current / Endless Pool Swim Jet
Counter Current / Endless Pool Swim Jet (Faceplate, Body & Tubes Only)